
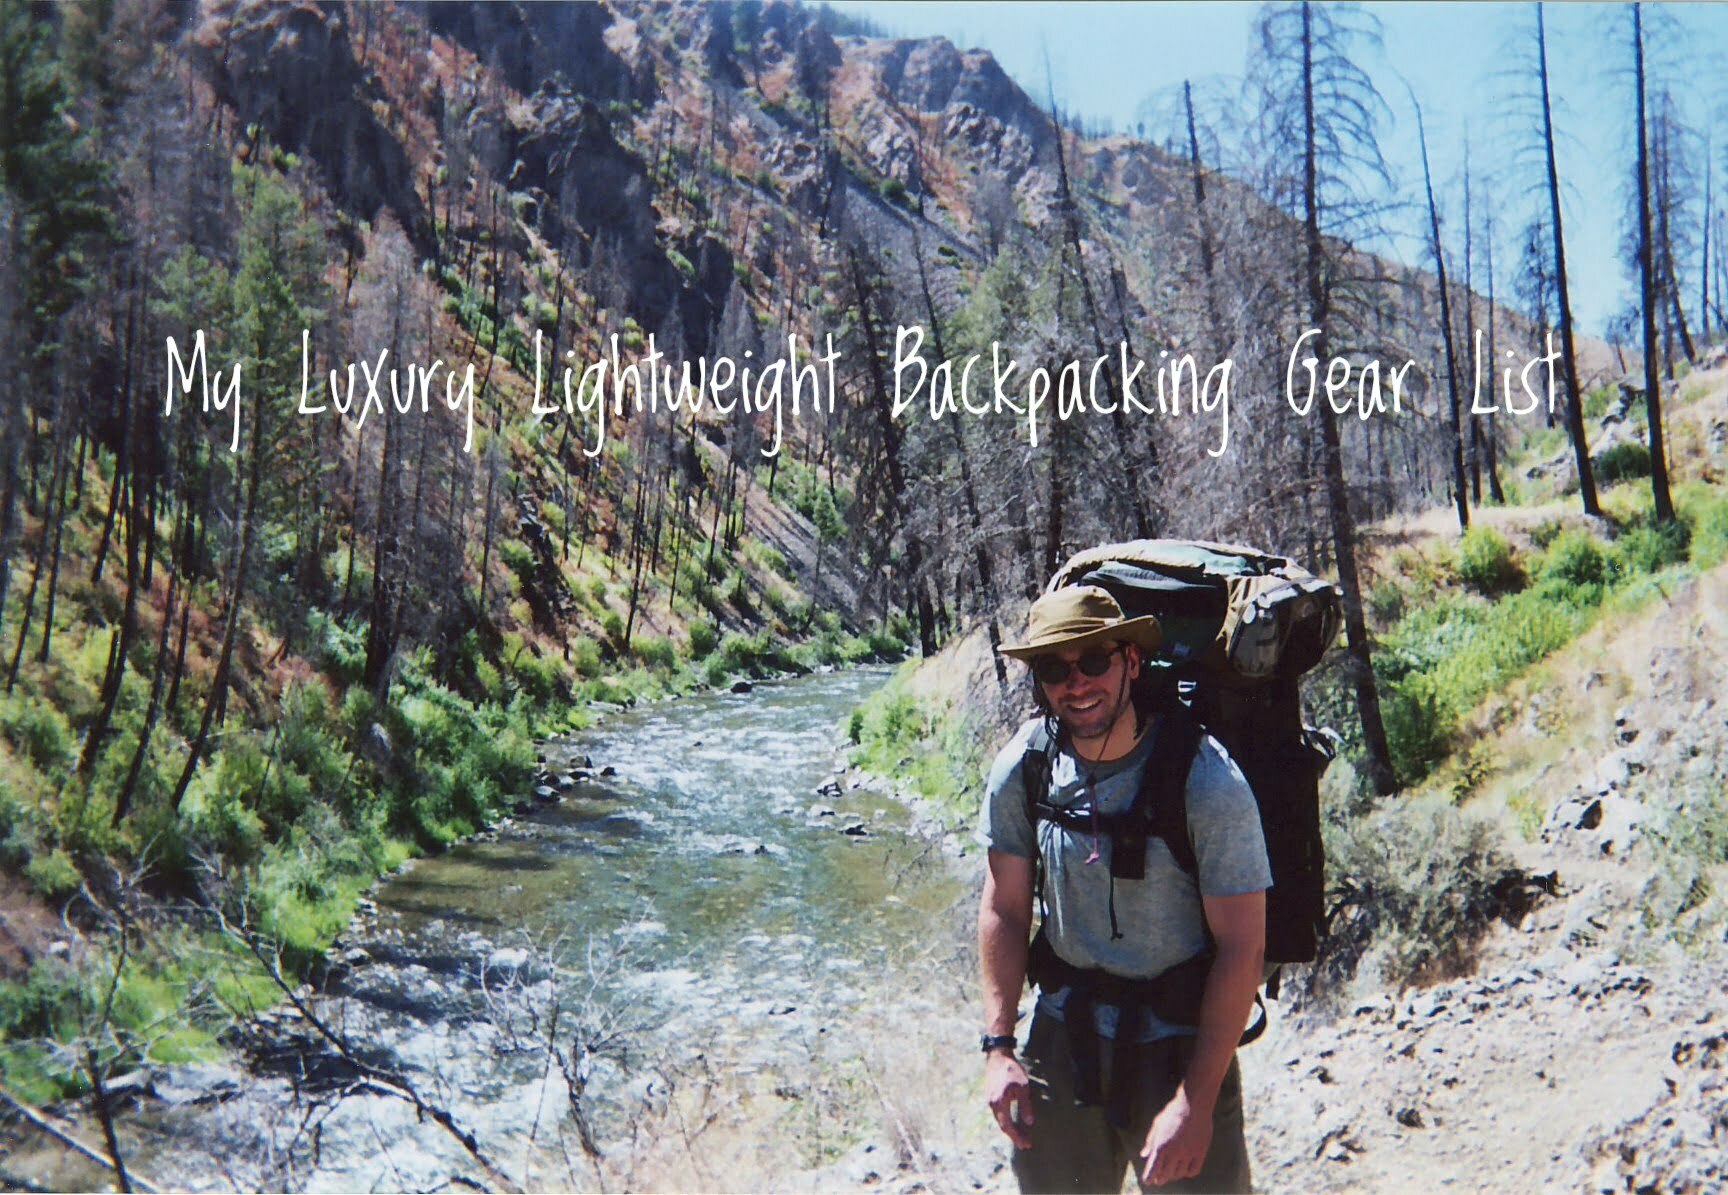
So do you want to lighten up your backpacking load? I have some experience doing this. But I’m not an ultralight backpacker. Nor am I an Appalachian Trail thru hiker. So I don’t count ounces, or even grams, when I’m backpacking. But I am a guy who likes to continually lighten up my base weight, while not sacrificing certain luxury items.
Thus, this would make me a luxury lightweight backpacker.
Never heard the term? Well, that’s because I just made it up, as it fits the style of backpacker I’ve become. It’s an evolution. Moreover, I believe the term, luxury lightweight backpacker, better matches the style of backpacking that most people do. Since most folks aren’t interested in going so ultralight that they leave all the luxury and creature comforts at home. Nor are most backpackers concerned with counting every ounce so that they can hike as many miles as possible each day.
Rather, I suspect that your average backpacker is someone like me, who just wants to get out backpacking in the great outdoors just a few times a year.
Someone, who enjoys hiking just a few miles each day, arriving at camp early so that they can get all set up. And still have lots of spare time leftover to just kick back, relax, and enjoy all the sights and sounds of nature before retiring for the evening. And if this is you, well, you’ll definitely want to read on because I’m going to share with you my recently upgraded luxury lightweight multi-day backpacking gear list. Which should give you some fantastic tips and ideas about how you can better enjoy the whole backpacking experience.
But first, allow me to give you a brief history of how I first got into going ultralight, or lightweight, with my backpacking gear list. And why I just recently upgraded much of my gear to match this new style of backpacking I’m advocating. Moreover, I’ll also share with you some of the advantages of backpacking with such a gear list. So let’s get straight into it.
Okay, so my first foray into truly lightening my backpacking weight load was when I was preparing to undertake an expedition backpacking trip into the Frank Church River of No Return Wilderness area in Idaho.
Just in case you don’t know, that’s the largest roadless area in the Lower 48. Filled with bear, cougar, wolves, moose, and what I really like, cutthroat trout. Anyway, I quickly realized, as I began to plan for my 2 1/2 week self-supported journey, that I wouldn’t even be able to shoulder my total pack weight unless I went ultralight with my gear. And so, I soon found myself purchasing a lot of brand new ultralight gear, including: a tent, sleeping pad, sleeping bag, titanium cookware, pack cover, and so on.
And, in the end, my good friend and I–using the advice from the online ultralight backpacking community–were able to pack enough food and gear into our backpacks to last us for the whole 2 1/2 week trip. Even more amazing was the fact that we were both able to complete our 74-mile journey through this remote wilderness area without having any MAJOR problems along the way. In short, my first foray into the world of ultralight backpacking was a resounding success!

But that trip was in 2010. And I hadn’t upgraded my backpacking gear, for the most part, since then. But that all changed in the fall of 2020, after I took my first 2-day backpacking trip into Grayson Highlands State Park with much of that old gear.

At that point, I quickly discovered that my old 2008 Gregory Shasta 83-liter backpack, weighing just under 7 pounds, was finally just too much to bear. It was too heavy, bulky. Moreover, it creaked and groaned, like an old floorboard, with every tortuous uphill step that I took on that trip.
That said, I was able to complete the trip without my back giving out on me. Nonetheless, I knew, as soon as the trip was over, that the good old days of hiking with that old crippling Gregory backpack were finally over. And so, it was time for a major upgrade of my backpack, and much of the rest of my gear.
No, I’m not going to go into specifics about each and every piece of equipment that I’ve upgraded in my quest to go more lightweight and modern with my backpacking gear. No, I wouldn’t want to bore my fine readers with details like that. Instead, I’ll just give you a very brief explanation of the advantages of owning such a gear list.
Incidentally, I should mention that this isn’t ALL the gear that I pack on my week long expedition fly fishing backpacking trips into certain wilderness areas. It’s simply the list of gear that I pack on my two to five day backpacking trips, during which I usually hike a leisurely 5 to 7 miles a day. Then spend a lot of time, chilling out in camp…
So therein lies the first advantage of my luxury lightweight backpacking gear list. One, it does NOT sacrifice certain creature comforts for the sake of weight.
As I mentioned, I usually only hike about 5 to 7 miles a day on these trips. Therefore, I end up with a couple hours of free time at my camp. And what I like doing with those extra hours is absolutely nothing. So, I just chill out in my hammock and stare up at the clear skies.

So clearly this list isn’t focused on JUST lightening my base weight. If I was doing that, I sure as heck wouldn’t pack the hammock, or straps. Rather, I’d just pack a tiny ultralight foam sit pad. Then, proceed to sit on it on the cold hard ground, eating my cold-soaked Ramen, after a painstaking, backbreaking day of having hiked 12 to 17 miles in the pouring rain. Oh, the joys of being an ultralight backpacker.
And, as you may have already guessed. Yeah, I’m not doing that. Which brings me to the second advantage of my gear list.
So advantage number two of my luxury lightweight gear list is that it includes a lightweight flask, filled with my favorite Tennessee whiskey.

That’s for chilling out at camp, after I’ve chilled out in my hammock, and ate a tasty hot meal at the end of a “hard” day of hiking. And who doesn’t like whiskey when camping?
Now I can just hear some of you saying that you’d rather burn one down. And that the grass is WAY lighter than my whiskey set up and you won’t get a hangover from it like you will with whiskey. Well, guess what? I agree …
It’s just that it isn’t currently legal at all in my home state. And I won’t buy it on the black market cause you can never tell what else is on the green stuff. So for now, and until they legalize it in my state, or on a Federal level. I’ll stick with the whiskey, which is great on it’s own.. And not in excess.
And finally, the third advantage of my luxury lightweight backpacking gear list is that it includes a two-person tent for one person.
In the past, I’ve actually camped in 1-person tents to cut weight and volume. But no, I’m not doing that anymore, as I just love the larger Big Agnes Copper Spur HV UL – UltralightBackpacking Tent (2 person).
And speaking of going bigger and better… I recently purchased a new BA Rapide SL 25″ wide sleeping pad (midsummer 2022), since my older sleeping pad was only 20″ wide. Unfortunately, this older, slimmer model always resulted in my elbows slipping off the sides. Then contacting the cold hard ground at an uncomfortable angle. Whaaa!

So there it is. The three advantages of my luxury lightweight backpacking gear list for the average backpacker, who just wants to get out backpacking a few times a year. And doesn’t want to worry about going completely ultralight and having to sacrifice comfort in camp for miles hiked during the day. So now, without further ado, here’s my current upgraded luxury lightweight backpacking gear list for a short multi-day trip. And, as a final point, I should mention that it’s organized in the rough order that I pack my gear, or by functional category, such as toiletries, as an example.
Drum roll, please…
And now, here’s Gary Alan’s Latest Luxury Lightweight Backpacking Gear List:
(?) is an optional item
Please note, as well, that this list does NOT include ALL of the tiny storage/pill bottles, small ultralight ditty bags, and large variety of custom ultralight dry bags that I often bring on my hiking trips to protect and organize my gear. You will have to customize these to your own specific backpacking needs, anyway.
Some of my dry bags are: Sea to Summit Lightweight Dry Sack 3-Piece Dry Bag Set, 1L, 2L, and 4L. And, I also recently added a 5-Pack of these affordable dry bags to my collection: Frelaxy Dry Sack 3-Pack/5-Pack, Ultralight Dry Bags.
Moreover, for food bags I’ve started using this Food Bag (Bear Bag) with Hanging Kit from Hilltop Packs. I purchased these premium food bags because they are ultralight, strong, durable, and also resist tearing when you stuff them with sharp-cornered snacks and camp meal packets. I ordered the large Food Bag (Bear Bag) with the flat bottom option and the upgraded bear line. And for good measure, I also bought their small Food Bag (Bear Bag) with a flat bottom and a tent pole stuff sack, as well.
And finally, if you’re wondering just how much everything weighs, I can tell you that with all my food items, the total pack weight varies between 28-30 pounds. That’s food for 3 to 5 days, usually.
Prescription glasses, etc:
- PRESCRIPTION glasses (pack 2 pairs: polarized sunglasses and 1 Transitions pair)
- lightweight hard glasses cases x 2
- 2 microfiber glasses cloths, MagicFiber Microfiber Cleaning Cloths, 6 PACK
- reading glasses (?)
Sunglasses:
If you don’t wear prescription glasses, then I recommend backpacking with Costa Del Mar Sunglasses. I still own two pairs! The polarized lenses really do reduce glare and provide crisp and clear vision. My lenses are yellow for low-light conditions. But most folks will prefer gray, copper, green, or blue lenses. I used to wear my Costa Del Mar Sunglasses almost religiously when I backpacked and fly fished with contact lenses. But I’ve since switched to prescription glasses.
- polarized sunglasses, Costa Del Mar Men’s Harpoon Oval Sunglasses
- sunglasses case, Sunglasses Case,(3 Pack) Portable Travel Zipper Eyeglasses
- micro cleaning cloths, MagicFiber Microfiber Cleaning Cloths, 6 PACK
Console bag OR Pocket/Body Gear:
- cap, KAVU cap
- keys
- wallet, Flowfold Vanguard Minimalist Bifold Wallet
- money
- credit cards
- smartphone
- ziploc bag(s)
- watch, Casio Men’s G-Shock
- tissue travel-size, Kleenex Facial Tissues
- pen(?)
- lip balm (?), ChapStick Moisturizer
- cloth face mask(?)
HIKE-IN/OUT CLOTHES:
- sun hat
- sweat band
- knife, Spyderco Native 5 Lightweight Signature Folder Knife
- 1 pair hiking socks, Darn Tough Boot Cushion Sock – Men’s
- hiking shoes, Merrell Men’s Moab 2 Vent Hiking Shoe
- 1 pair underwear, New Balance Men’s 3″ No Fly Boxer Brief with Built in Pouch Support, No Fly Boxer Trunks (3-Pack of Trunk Briefs)
- 1 pair quick dry shorts or pants
- 1 short sleeve quick dry shirt, Columbia Men’s Thistletown Hills Short Sleeve (AND/OR)
- 1 long sleeve button-up quick dry shirt, Simms Men’s Stone Cold Long Sleeve Shirt, UPF 30
NOTE: Your shirt is going to get soaked in sweat so it’s best to wear only 1 short-sleeve shirt, if temperatures permit.
Trekking poles:
In 2023, I began using trekking poles solely for my backpacking trips. The reason I began doing this was to decrease the chances of me falling in wilderness areas and to ease the difficulty of hiking elevation when wearing a fully loaded backpack, weighing between 29 and 50 pounds. The trekking poles also helped speed up my progress on the trail, particularly on the flats. That said, I do not use these for my day hikes. The trekking poles listed below are the current pair I’m using and enjoying. Anyway, they should help you maintain your balance on rocky, slick trails, preventing falls, and assist you with strenuous steep uphill hikes.
BACKPACK and accessories:
- lightweight backpack (40-75L), Gregory Mountain Products Focal 58
- pack cover, (comes with the above pack)
- liner bags, Clear Waterproof Pack Liners (gossamer gear)
- flash backpack, (?) useful for water runs, Sea to Summit Ultra-Sil Nano Ultralight Day Pack, 18-Liter
TENT, POLES, STAKES:
- Tent, Big Agnes Copper Spur HV UL (2 person). (I recommend the Big Agnes Tiger Wall UL Ultralight Tent (2-person) or the Copper Spur)
- Tent stakes, (cool blue color!), Paria Needle Stakes – 10 Pack
SLEEP SYSTEM:
- Western Mountaineering TerraLite 25 Degree Down Sleeping Bag
- Sleeping bag stuff sack
- (sleeping bag gets stored in a Sea to Summit dry sack)
- sleeping pad, Big Agnes Rapide SL Insulated Sleeping Pad, Orange, Wide Regular (25X72)
- sleeping pad pump (pair it with your BA sleeping pad to save your breath), Big Agnes Pumphouse Ultra Multi-Use Sleeping Pad Pump
- DO NOT PACK: Therm-a-Rest stuff sack pillow case, Therm-a-Rest Trekker Stuffable Backpacking Pillow Case
- DO NOT PACK: inflatable pillow w/ storage sack, Trekology Ultralight Inflatable Camping Travel Pillow
- UPDATE: In 2024, I have FULLY TESTED my new Exped Down Pillow on several overnight backpacking trips and found it to be the MOST COMFORTABLE BACKPACKING PILLOW that I’ve ever slept on! So I’m no longer packing the two pillow items listed, directly above. That said, you will need to pair the Exped Down Pillow with some QUILT STRAPS to secure it to your sleeping pad to ensure a wonderful sleep in the wild. However, the quilt straps that I purchased are no longer available, so you’ll have to search for these.
CAMP FURNITURE:
- Therm-a-Rest Z Sol Seat, (Can use as a WINDSHIELD, too.)
- hammock, KAMMOK: Roo Single Hammock, (A hammock is more comfortable and relaxing than any camp chair.)
- hammock straps, Kammok Python Hammock Suspension Straps
- Note in 2024, I have fully tested my new Hummingbird Single Hammock, which weighs less than my old hammock above. That said, the KAMMOK: Roo Single Hammock, above, is a bit more comfortable and robust. So I’ll maintain both links above, to allow buyer discretion.
- I’ll couple my Hummingbird Single Hammock with some Hammock Gear Ultralight Daisy Chain straps, which are definitely NOT as robust as the suspension straps above
- helinox CHAIR “ZERO” (?) WEIGHS 17 oz, or 1 lb 1 oz, Helinox Chair Zero Ultralight Compact Camping Chair
CAMP SHOES:
- CROCS (COMFY!), Crocs Unisex-Adult Classic Clogs
WATER TREATMENT SYSTEM:
- 1 Liter clear water bottle, (use Life Water or another compatible bottle.)
- HYDROBLU water filter, HydroBlu Versa Flow Water Filter System, (SLEEP WITH IT IN COLD WEATHER OR MICRO MESH WILL FREEZE & BREAK)
- 2 CNOC Vecto 3L Water Containers, 28mm
- net storage bag
- Handheld water filter, (provides convenience and redundancy should your primary water filter fail), Katadyn BeFree 1.0L Water Filter
Please NOTE: I often pack 2 Katadyn BeFree 1.0L Water Filters and one Cnoc Outdoors 42mm Vecto Water Container, coupling this with a Hydriam 500ml Flask, 42mm, which I filter from when I’m on the trail. Instead of the above system. In this case, I also pack a 32 oz Nalgene bottle. But only for shorter trips, when I do not care about the convenience of a gravity water filter system, like I do when I’m backpacking for over 4 days.
SOLID WASTE GEAR:
- TROWEL, Ultralight Backpacking Trowel, 0.48 oz (13.5g) Orange
- Flushable WIPES x 2-3 / day, Goodwipes Flushable Aloe Butt Wipes, Septic Safe – 360 Count Rosewater Wet Wipes
- 3 Quart ziploc bags: 2 storage & 1 freezer, Ziploc Quart Food Storage Bags; Ziploc Quart Food Storage Freezer Bags
- 2 Gallon freezer ziplocs, Ziploc Gallon Food Storage Freezer Bags
- 1/3 mini roll of toilet paper in qt ziploc, Coghlan’s Packable Camp Toilet Tissue
JOURNAL AND PENS, ETC:
- 4×6″ JOURNAL NOTEBOOK, stored in qt ziploc
- 2 PENS (TEST B4 LEAVING)
- BOOK (?), Big Thunder-Hearted River, (only need a book, if u might have a few days of HEAVY RAIN or u r on an expedition trip. I prefer star-gazing to reading when camping.)
- small playing cards (??)
HEADLAMP and BATTERIES:
- HEADLAMP, PETZL ACTIK CORE Headlamp
- TEST & ADD 3 AAA BATTERIES, Duracell – CopperTop AAA Alkaline Batteries
- Portable Power Charger
- SMARTPHONE CHARGING CABLE, USB C to USB C 60W Cable, JSAUX[2-Pack 6.6ft] Type C Charger Cord
BATHROOM ITEMS:
- FLONASE, Flonase Allergy Relief Nasal Spray, keeps you sane!
- allegra, Allegra Adult 24 Hour Allergy Tablets, 180Mg
- toothbrush, Bamboo Toothbrushes
- 1 toothbrush cover, 20 Pack Travel Toothbrush Head Covers
- toothpaste, 1 .85 oz. of mini toothpaste will last 2 weeks, Tom’s of Maine, Fluoride Free
- floss, Glide Crest Comfort Plus Dental Floss Mint 40m each (6 pack)
- deodorant travel size
- lip balm w/ sunscreen, ChapStick Moisturizer
- 1 small shammy cloth (great 4 tent wipe down, when wet from DEW or RAIN), 3pk Original German Shammy Towels Super Absorbent Chamois Cloths, (cut to tiny small size)
- 1 SMALL pack towel body cloth, Soft Gym Towel Set for Hiking Yoga Travel Sports Backpacking Trip and Pool
- 1 camp mirror (?), Coghlan’s Featherweight Mirror
- 1 Dr. Bronner’s Magic soap x 1-2 fl. oz. (?) (Don’t need for 2-3 day trip) (easily enough for 2 weeks washing body, clothes & shaving), Dr. Bronner’s – Pure-Castile Liquid Soap (2 Ounce Variety Gift Pack)
- 1 disposable 1 bladed razor (?) (don’t need 2-4 day trip), Bic Single Blade Shavers Sensitive Skin – 12 ct (3 packs of 12)
- travel-size hand lotion (?) (need out west)
- facial moisturizer sunscreen (?) (need out west), CeraVe Moisturizing Lotion SPF 30| Sunscreen and Face Moisturizer
COOK SET SYSTEM:
- titanium cup, Snow Peak Double-walled titanium cup
NOTE: I ONLY pack 1 of the 2 ultralight pots listed below:
- EVERNEW POT 900 ml, EVERNEW Titanium Ultralight Pot, 0.9-Liter, Black
- EVERNEW Titanium Pasta Pot, Evernew Titanium Lightweight Pasta Camping Pot with Strainer Lid
- MSR SMALL FUEL CAN 7.4 oz / 211 gr
- WILDO FOLDACUP, Wildo Fold-A-Cup 200ml Olive, (optional item)
- MSR stove, MSR PocketRocket Deluxe Ultralight Camping and Backpacking Stove
- 1 mini bic lighter, BIC Lot of 5 Mini Multi-Colour Lighter Lot
- match strike surface in mini ziploc
- 1 mini scrub pad, Scotch-Brite Heavy Duty Scour Pads, 8 Pads
- 1 wooden spoon, Spoons, Wooden Spoons for Eating, 6 Pieces Japanese Natural
- 1 butter knife, Totally Bamboo Take Along Reusable Utensil Set with Blue Travel Case
- titanium flask, SILVERANT Titanium Ultralight 248ml/8.38 fl oz Hip Flask
CLOTHING:
- raincoat, MARMOT Men’s Precip Eco Jacket
- rain pants, MARMOT PreCip Eco Pants
- Patagonia nano puff jacket, 11.9 oz
THERMAL LAYERS:
- 1 merino wool short sleeve shirt, Merino.tech Merino Wool T-Shirt Mens
- 1 merino wool long sleeve shirt, 100% Merino Wool Shirts for Men Thermal Underwear Long Sleeve T-Shirt for Hiking Hunting
- 1 merino long underwear bottoms (165), Merino Wool Base Layer Mens Bottom Pants 100% Merino Wool Thermal Underwear Long Johns
- 1 pair underwear, New Balance Men’s 3″ No Fly Boxer Brief with Built in Pouch Support, No Fly Boxer Trunks (3-Pack of Trunk Briefs)
- 1 pair of smartwool socks (cold weather), Smartwool Classic Hike Full Cushion Crew Sock – Men’s
- Down Booties: Instead of packing the smartwool socks above, in colder temperatures, below 50 or 47 degrees, I’ll pack Down Booties. They are expensive and worth it to keep your toes toasty. I bought mine from GooseFeet Gear for $75 in 2021.
- 1 merino wool neckwarmer / buff, BUFF Adult Lightweight Merino Wool
- 1 pair of North Face gloves, The North Face Etip Heavyweight Fleece Glove
- 1 patagonia hat
- 1 pair down booties (??) (night temperature below 40-45 degrees)
- 1 pair silk underwear (??) (only USE these in HOT weather)
DRY CAMP CLOTHES:
- 1 PAIR UL QUICK-DRY PANTS
- 1 LONG SLEEVE UL QUICK-DRY SHIRT, Simms Men’s Stone Cold Long Sleeve Shirt, UPF 30
ROPE BAG:
- 1 CHARTREUSE 50′ parachord (this is for bear hang and DRY line on LAST DAY! You can also use the slick line instead, mentioned in the dry bag links above), Assorted Colors of Paracord in 50 and 100 Foot Lengths
- 1 black 25′ parachord (?) dry/tarp line
- 1 black 15′ parachord (?) dry line
First Aid and Repair Kit:
For first aid items, you may want to purchase a lightweight First Aid Kit to get started. That’s what I did when I first started backpacking on my own. Eventually, I customized my own kit, which is stored in a quart Ziploc bag. However, I’m not medically certified at this time. Therefore, I can only offer suggestions here, and no medical advice. In addition to your first aid kit, I’d recommend adding these items to your kit:
- cork massage balls, Rawlogy Original Ultralight Cork Massage Ball Set
- leukotape wrapped around 1/3 pen casing, BSN Medical BEI076168 Leukotape P Sports Tape, 1 1/2 Inch x 15 Yard
- 2 sewing needles inside 1/3 pen casing, SoFire 2 Box Pre Threaded Needle Kit Clothing Repairing Kit
- black thread, COATS & CLARK Extra Strong Upholstery Thread, 150-Yard
- ear plugs, Mack’s Ultra Soft Foam Earplugs, 50 Pair
- 2 rolls duct tape, Best Glide ASE Mini Survival Repair Tape
- swiss army knife, Victorinox Swiss Army Classic SD Pocket Knife
- aspirin pain reliever and fever reducer 325mg x 12
- mini petroleum jelly, CURAD Petroleum Jelly, Skin Protectant
- cotton balls, about 20 or so, DecorRack 300 Small Cotton Balls
- immodium x 6, Imodium AD Diarrhea Relief Caplets
- benedryl x 4, Benadryl Ultratabs Go Packs, Antihistamine Tablets with Diphenhydramine HCl, 2 Count, Pack of 4
Subscribe:
Thank you for reading my post about My Luxury Lightweight Backpacking Gear List. If you’ve enjoyed reading this, please subscribe so that I can send you notices about my future posts. Subscribing is FREE and I don’t spam or share your email. Also, please share this post with your friends, family members, and co-workers on the usual social networks. This will help support this blog and grow my audience.
Disclaimer:
Please note, as well, that this post contains affiliate links, meaning, I recommended products and services I’ve used or know well and I may receive a commission if you purchase them too (at no additional cost to you). As an Amazon Associate, I earn from qualifying purchases.
Gary Alan
After a long career in the publishing industry, Gary Alan left his corporate job to pursue his next adventures in life as a blogger, writer, investor, fly fisherman, hiker, and traveler. He is the author of the adventure fiction book, 'Big Thunder-Hearted River'.